Hi Admin! This whole platform is all about creating a Certificate, but the question is how?
Don’t worry, we are here to give you insight into the step-by-step procedure of creating a Certificate via linked drives.
If you have your artistic work on your linked drives, then you can own the Certificate of creation to get a sense of authority by performing very simple steps.
"Certificate generation can only be done via credit points for enterprise user. Admins and business user does not have the functionality to generate Certificate via payment gateway."
Create Certificate
Step 1:
Select “Create Certificate”

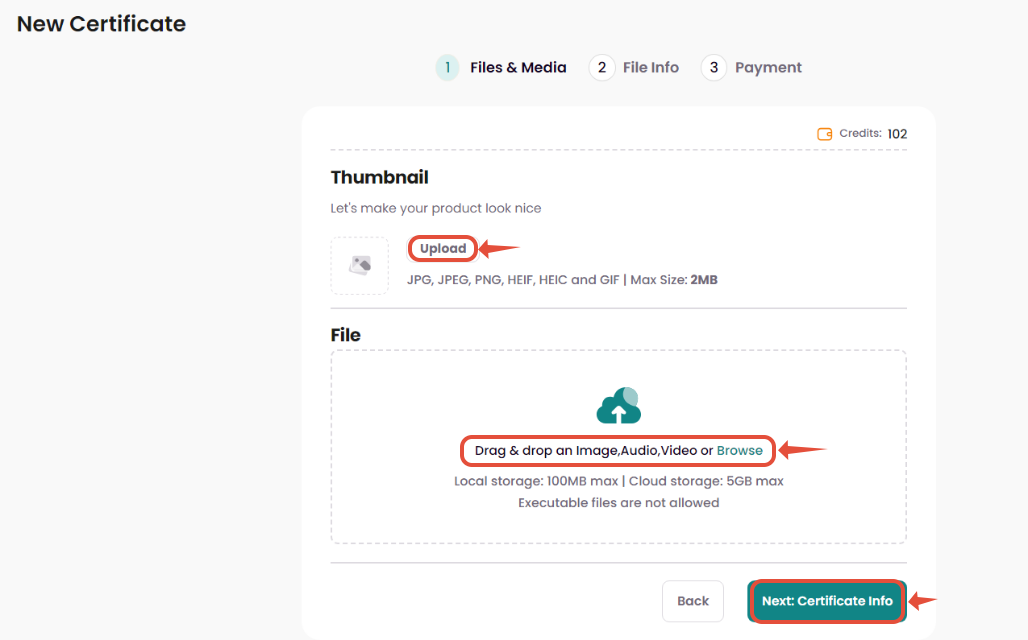
Step 2:
Upload File and Thumbnail
- On “Files and Media” page, upload your file’s thumbnail image first.
The basic criteria to upload thumbnail image: Recommended size:200×130 | JPG, PNG, Max Size:2MB.
- Drag and drop your image/audio/video file or click “Browse” to upload from local storage.

The criteria to upload a file:
Local drive - 100MB
Cloud Storge - 5GB
- Click “Next: Certificate Info” to proceed to the second step in Certificate generation.
Step 3:
Fill Certificate Information
- In the “File Info” page, Certificate information must be filled out.
The Certificate info includes:
- File Name
- Category
- Status
- Folder i.e., the desired folder in MyIPR to store the Certificate.
- Description i.e., additional information about the Certificate/file.
- Click “Next: Payment” to proceed to pay for the Certificate.

Step 4:
Pay with Credit Bundle
- Select “PAY with Credits” to proceed to pay for the Certificate using the MyIPR Credits.
- Click “Proceed to pay” to confirm your transaction.

Step 5:
Hurray! Your Certificate is available in your “My Collections”.

Certificate Details
Step 1:
Check your Certificate details here.

Step 2:
Here are the details of your Certificate that is minted successfully.

Download Certificate
Step 1:
Get the Certificate of Creation
- Once a new creation or a new version of your asset is submitted successfully, a Certificate will be generated which can be downloaded for future references.

Step 2:
Information on the certificate
- See your certificate will look like this.

- The Certificate generated by MyIPR will include specific information related to the uploaded file and its associated metadata. The Hash of the file is generated using only the “File” without any metadata.
The Certificate will contain the following details:
- Name of the creator
- The wallet address of the creator
- Name of the file
- The hash of the file
- Timestamp indicating the time of certification.
- Transaction ID associated with the Certificate. This should also have a link to direct the user to the block explorer for verifying transactions on the chain.
- QR code that directs users to the Certificate verification page.
- A link that directs users to the block explorer transaction page for further details.
Hope this article helped with your journey on the MyIPR platform.
Click here to learn more about MyIPR, and stay tuned with us for more insights.
Was this article helpful?
That’s Great!
Thank you for your feedback
Sorry! We couldn't be helpful
Thank you for your feedback
Feedback sent
We appreciate your effort and will try to fix the article